I know it has been awhile since my last post and I am sorry it has taken me so long to do one! I finally have one for you and this one is a good one ;) I love this makeup its great for basically anything. I love how dramatic it makes my eyes look. Its a soft, feminine but also sexy look.
 Step one is always the same and never will change. ;) Moisturize and apply primer. I'm of course using my trusty Smashbox primer. There are cheaper versions of course the MAC one is great as well. Next apply foundation I'm using Smashbox's High Definition foundation. Next apply powder to set the foundation, I'm using Halo by Smashbox.
 Don't apply concealer yet, since you are using a lot of color little pieces will fall and create dark circles. We want to keep this look looking clean. To do so you will need to have tissue at hand to wipe brushes and your eyes at times. Make sure also to have q-tips and eye makeup remover handy just in case you make any mistakes. Fill in your eyebrows with light hair-like strokes.
Eye primer is key to make the colors stand out. I am using my favorite Painterly by MAC. This is seriously the best eye primer ever. I love the way the colors stand out. Apply all over your eye dabbing with your ring finger. Wait for it to dry before you apply any color.


 I am using my Coastal Scents palette for almost all the colors in this look.The first color we want to start with is some purples. I took three purples and applied all over my eyelid to create my own color. I love the way the three colors look. Instead of using brushes I used my fingers, I suggest you do the same. You can control what area gets color and what doesn't.

Next take a light peachy pink and apply from your crease to almost to your brow bone. I'm using a peach from MAC. You can use any peachy color you want. Blend the color and fade it out a bit. I am using MAC 275 blending brush. This is my favorite brush ever. I use it all the time for blending and applying. The right brushes definitely make a difference. Cheap brushes that work well are Kirkland's from Costco. You get 5 or so brushes. They are pretty amazing, I am hooked on a few of them as well.

Next I took a bright pink color and applied it in the right hand corner of my eyelid. Just take your finger and lightly sweep the color across the darker purple. Next I took two browns and applied them right under my brow bone just above my crease. This give the pink a darker color and a little bit more depth. I just love how all these colors look together :) Take your blending brush and blend the colors together. But lightly blend cause you don't want the colors to look muddy. Then apply a pearl white color on your brow bone and blend into the browns. The last bit of color you add is the bright pink again and apply right under your lower lash ling for some added color. I am using MAC's 219 Pencil Brush. This is perfect for your lower lash line and even gets between the lashes. Then take a black color with the same brush and apply over the bright pink on your lower lash line. This gives you a smokey effect. Just one sweep is good enough, you don't want to over power the pink.

 Next is my favorite part. Apply false lashes. I love how dramatic your lashes look with fake lashes. If you have never used false lashes, you really do not know what you are missing! Its not just for people with short lashes, I have long lashes and still love false lashes ;) You can use any lashes of your choice. I am using MAC's lashes. I simply adore these lashes they are great quality and can be used numerous amount of times. However drugstore lashes work just as well :) They are really cheap too! :D You want to apply a thin strip of glue along the lashes and then wait 30 seconds for it to get tacky. There are no tricks I can give you for this one, you just have to practice. You won't get them on the first try so don't get frustrated. Just keep trying, applying fresh glue each time. The best glue out there is the Duo Adhesive. The lashes stay put all day long and wont budge.

Now to hide the line of the lashes and make them blend better we will take a liquid eyeliner. I am using LOreal's Telescopic Liquid Eyeliner. Steady your hand and rest it on your cheek. Start from the middle and work your way out to the outer corner. I created a tiny wing at the corner, you don't have to do this I just liked the way it looked with the lashes giving me a cutesy girl look. Make sure you trace the inner corner as well to give your eye depth and shape. Make the line thicker towards the outer corner and thinner towards the inner corner. If you make a mistake when you are creating the wing take the q-tip and dip it into some makeup remover and wipe away your mistake. Wait for it to dry and try again. Just be patient. Don't worry about messing up, I messed up a few times on my left eye. :p

Now we want to brighten up the eyes just a tad bit. Take a white eyeliner and trace right inside your water line. I am using Ulta's Brand which is light enough to give me a little brightness but not look trashy :p Wipe any fallouts (any eyeshadow that may have fallen underneath your eye) with the handy dandy tissue you have and apply concealer. Also apply concealer to the sides of your nose and around your lips to give them a more defined look. Also to any blemishes you may want to hide.
For the blush you want a dark pink, no matter your skin tone. It looks best with this look. I am using Bare Escentuals So Fab. Start from your cheekbones and work your way down. Make sure you have a good brush that blends so if you have too much color on one cheek you can easily tame it down. For a "I'm in love" glow, take Benefit's High Beam highlighter and apply on the apples of your cheeks and above your eyebrows. My secret to looking gorgeous and flawless ;)


Final step, Lips, I am using Very Sexy E32 Sleek. Apply a lip balm on your lips to moisten them up a bit and then apply the lipstick. Make sure you get the corners of your mouth as well. It looks silly when you smile and your lips aren't all one color :p

And viola ladies! You are now gorgeous-er :p I hope you love this look as much as I do. :) If you have any questions, comments, or suggestions. Please do email me :)

Continue reading...
 Step one is always the same and never will change. ;) Moisturize and apply primer. I'm of course using my trusty Smashbox primer. There are cheaper versions of course the MAC one is great as well. Next apply foundation I'm using Smashbox's High Definition foundation. Next apply powder to set the foundation, I'm using Halo by Smashbox.
 Don't apply concealer yet, since you are using a lot of color little pieces will fall and create dark circles. We want to keep this look looking clean. To do so you will need to have tissue at hand to wipe brushes and your eyes at times. Make sure also to have q-tips and eye makeup remover handy just in case you make any mistakes. Fill in your eyebrows with light hair-like strokes.
Eye primer is key to make the colors stand out. I am using my favorite Painterly by MAC. This is seriously the best eye primer ever. I love the way the colors stand out. Apply all over your eye dabbing with your ring finger. Wait for it to dry before you apply any color.


 I am using my Coastal Scents palette for almost all the colors in this look.The first color we want to start with is some purples. I took three purples and applied all over my eyelid to create my own color. I love the way the three colors look. Instead of using brushes I used my fingers, I suggest you do the same. You can control what area gets color and what doesn't.
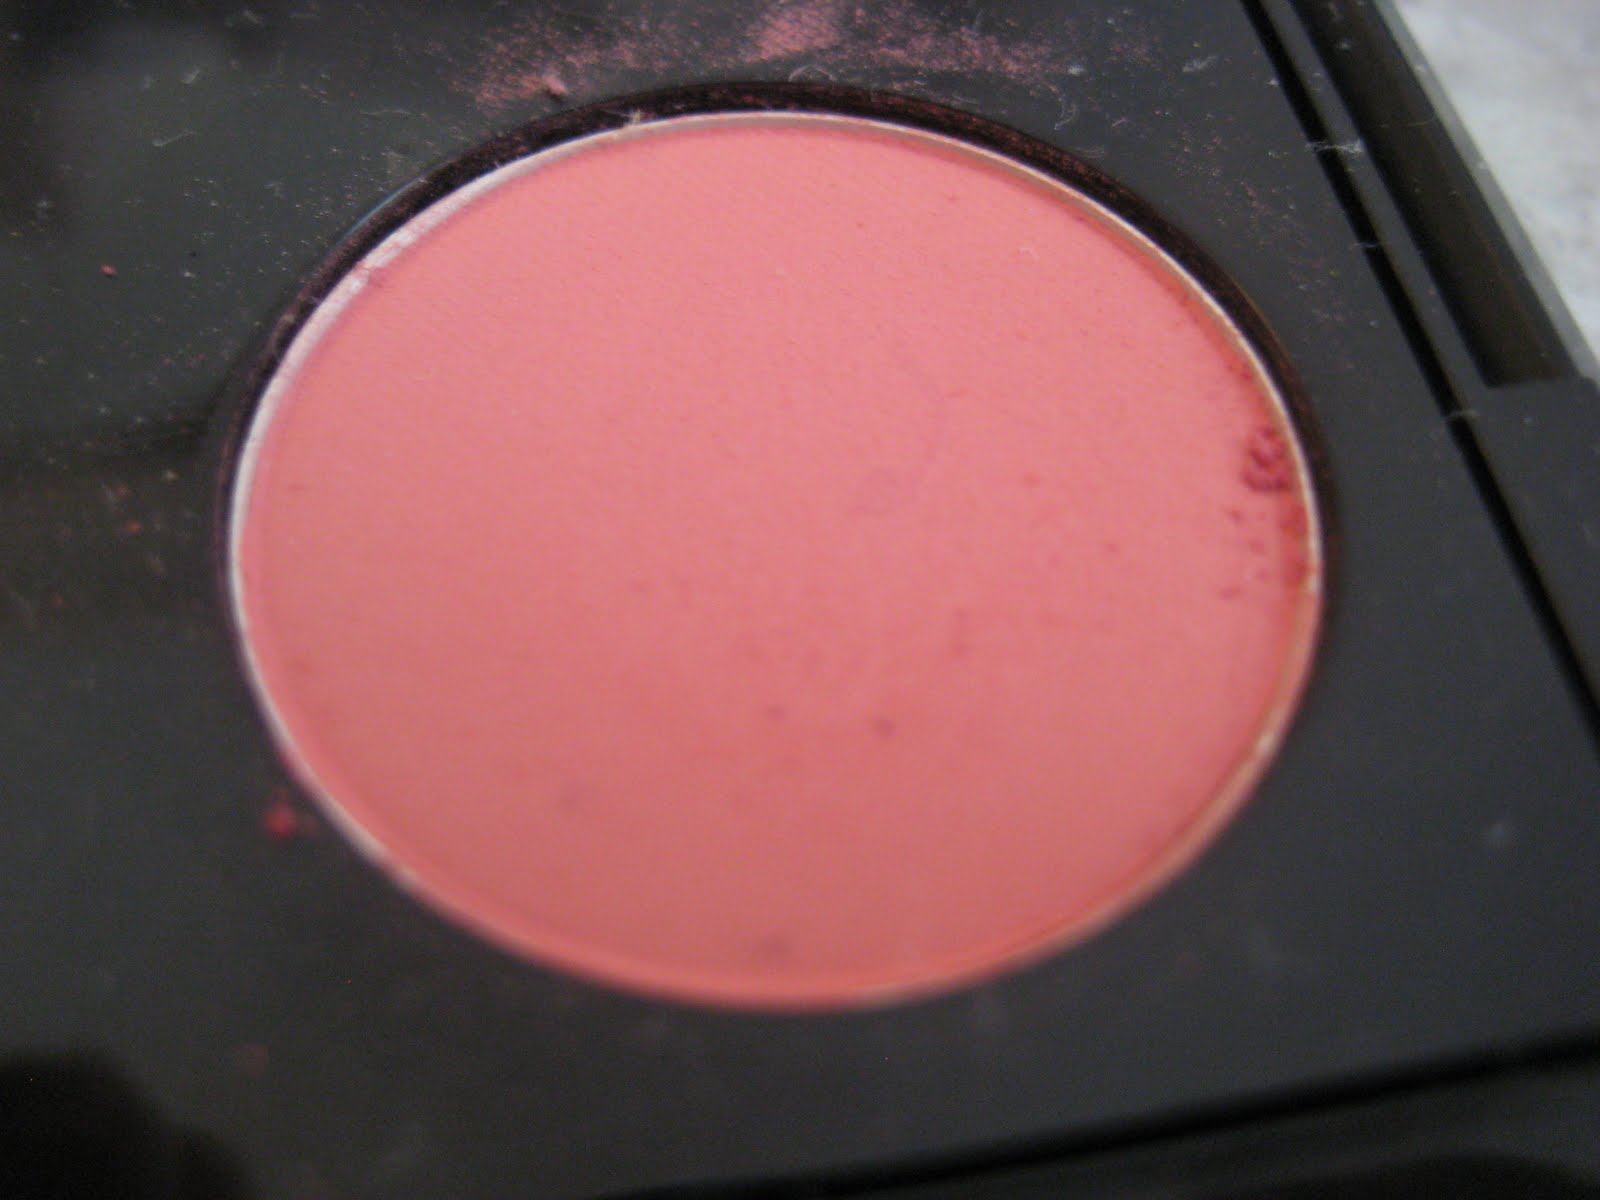
Next take a light peachy pink and apply from your crease to almost to your brow bone. I'm using a peach from MAC. You can use any peachy color you want. Blend the color and fade it out a bit. I am using MAC 275 blending brush. This is my favorite brush ever. I use it all the time for blending and applying. The right brushes definitely make a difference. Cheap brushes that work well are Kirkland's from Costco. You get 5 or so brushes. They are pretty amazing, I am hooked on a few of them as well.

Next I took a bright pink color and applied it in the right hand corner of my eyelid. Just take your finger and lightly sweep the color across the darker purple. Next I took two browns and applied them right under my brow bone just above my crease. This give the pink a darker color and a little bit more depth. I just love how all these colors look together :) Take your blending brush and blend the colors together. But lightly blend cause you don't want the colors to look muddy. Then apply a pearl white color on your brow bone and blend into the browns. The last bit of color you add is the bright pink again and apply right under your lower lash ling for some added color. I am using MAC's 219 Pencil Brush. This is perfect for your lower lash line and even gets between the lashes. Then take a black color with the same brush and apply over the bright pink on your lower lash line. This gives you a smokey effect. Just one sweep is good enough, you don't want to over power the pink.

 Next is my favorite part. Apply false lashes. I love how dramatic your lashes look with fake lashes. If you have never used false lashes, you really do not know what you are missing! Its not just for people with short lashes, I have long lashes and still love false lashes ;) You can use any lashes of your choice. I am using MAC's lashes. I simply adore these lashes they are great quality and can be used numerous amount of times. However drugstore lashes work just as well :) They are really cheap too! :D You want to apply a thin strip of glue along the lashes and then wait 30 seconds for it to get tacky. There are no tricks I can give you for this one, you just have to practice. You won't get them on the first try so don't get frustrated. Just keep trying, applying fresh glue each time. The best glue out there is the Duo Adhesive. The lashes stay put all day long and wont budge.
Now to hide the line of the lashes and make them blend better we will take a liquid eyeliner. I am using LOreal's Telescopic Liquid Eyeliner. Steady your hand and rest it on your cheek. Start from the middle and work your way out to the outer corner. I created a tiny wing at the corner, you don't have to do this I just liked the way it looked with the lashes giving me a cutesy girl look. Make sure you trace the inner corner as well to give your eye depth and shape. Make the line thicker towards the outer corner and thinner towards the inner corner. If you make a mistake when you are creating the wing take the q-tip and dip it into some makeup remover and wipe away your mistake. Wait for it to dry and try again. Just be patient. Don't worry about messing up, I messed up a few times on my left eye. :p

Now we want to brighten up the eyes just a tad bit. Take a white eyeliner and trace right inside your water line. I am using Ulta's Brand which is light enough to give me a little brightness but not look trashy :p Wipe any fallouts (any eyeshadow that may have fallen underneath your eye) with the handy dandy tissue you have and apply concealer. Also apply concealer to the sides of your nose and around your lips to give them a more defined look. Also to any blemishes you may want to hide.
For the blush you want a dark pink, no matter your skin tone. It looks best with this look. I am using Bare Escentuals So Fab. Start from your cheekbones and work your way down. Make sure you have a good brush that blends so if you have too much color on one cheek you can easily tame it down. For a "I'm in love" glow, take Benefit's High Beam highlighter and apply on the apples of your cheeks and above your eyebrows. My secret to looking gorgeous and flawless ;)


Final step, Lips, I am using Very Sexy E32 Sleek. Apply a lip balm on your lips to moisten them up a bit and then apply the lipstick. Make sure you get the corners of your mouth as well. It looks silly when you smile and your lips aren't all one color :p

And viola ladies! You are now gorgeous-er :p I hope you love this look as much as I do. :) If you have any questions, comments, or suggestions. Please do email me :)


