I love the old Nintendo Mario games, Super Mario Bros 3 was my favorite :) So I thought of doing an easy and quick tutorial for those last minute Halloween parties.

 First apply an eyelid primer to make the colors pop, especially with pink because sometimes the color is not bright enough to see. Apply a bright pink eyeshadow all over your eyelid. I used my Coastal Scents 88 palette. Any pink will be fine. Next apply a dark purple color to the crease for definition and for a pretty color palette. Buff the color up towards your brow bone. Next take a pearl shimmery white color and apply it right on your brow bone. Blend the color down to the purple to fade the purple out. The purple should be dark in the crease and light toward the brow bone.
For eyeliner I used a felt tip eyeliner pen, but you are welcome to use liquid eyeliner. I prefer to use the felt tip for this specific look because you can manipulate the brush to your liking. Create a line beginning from the inner corner of your eye to the outer corner, wing it out. For best results start the line in the middle of your eye and work your way out. Make the line thicker toward your outer corner and wing it out. If you make any mistakes use a q-tip with a little bit of makeup remover.
 Next take a white eyeliner and line your waterline. Really pack that eyeliner on, you want to brighten up your eyes and also give them a doll like appearance.
For eyebrows, lightly fill them in, I used a light brown to just color them in. You want to keep them light especially if you are going to be wearing a blonde wig.
Next apply the individual false lashes, apply them to the outer corner of your eyes. Two or three should be sufficient enough. Heat your lash curler, then curl your lashes with the fake lashes and apply mascara. Heating your eyelash curler acts as a curling iron for them. Make sure its not too hot to put on your eyelid though. Just warm enough to curl them. I didn't apply the fake lashes because I like the way my lashes looked. Curl your lashes again to give them an extra boost.
The finished eye should look like this:

Cheeks are next, no not those ones :p Use a really pinky color. I used my Smashbox O-Glow blush. Which comes out of the tube clear but when applied on skin turns pink. Apply it to the apple and your cheek bones. Blend really well so the color is not as strong. You want to have a pink glow, not a i-obviously-put-blush-on look.

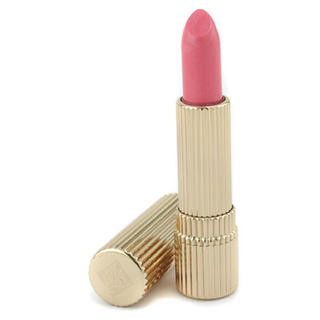
For the lips, well Peach has really tiny lips. But I lined my lips with a pink color and put a peach lip gloss on. You can exaggerate her lips if you would like, it is really up to you :)
If you have brown hair like I do, get a blonde wig. I made a paper crown out of construction paper and glued little craft gems to it for just a simple Princess look. Her crown is really tiny so one piece of construction paper should be fine. And to secure the crown so it doesn't fall off your head you can use blonde bobby pins. :)
VIOLA! DONE! :D You have now been transformed into Princess Peach :) If you have any questions, comment, concerns, complaints ect. Email me! :)

Continue reading...

 First apply an eyelid primer to make the colors pop, especially with pink because sometimes the color is not bright enough to see. Apply a bright pink eyeshadow all over your eyelid. I used my Coastal Scents 88 palette. Any pink will be fine. Next apply a dark purple color to the crease for definition and for a pretty color palette. Buff the color up towards your brow bone. Next take a pearl shimmery white color and apply it right on your brow bone. Blend the color down to the purple to fade the purple out. The purple should be dark in the crease and light toward the brow bone.
For eyeliner I used a felt tip eyeliner pen, but you are welcome to use liquid eyeliner. I prefer to use the felt tip for this specific look because you can manipulate the brush to your liking. Create a line beginning from the inner corner of your eye to the outer corner, wing it out. For best results start the line in the middle of your eye and work your way out. Make the line thicker toward your outer corner and wing it out. If you make any mistakes use a q-tip with a little bit of makeup remover.
 Next take a white eyeliner and line your waterline. Really pack that eyeliner on, you want to brighten up your eyes and also give them a doll like appearance.
For eyebrows, lightly fill them in, I used a light brown to just color them in. You want to keep them light especially if you are going to be wearing a blonde wig.
Next apply the individual false lashes, apply them to the outer corner of your eyes. Two or three should be sufficient enough. Heat your lash curler, then curl your lashes with the fake lashes and apply mascara. Heating your eyelash curler acts as a curling iron for them. Make sure its not too hot to put on your eyelid though. Just warm enough to curl them. I didn't apply the fake lashes because I like the way my lashes looked. Curl your lashes again to give them an extra boost.
The finished eye should look like this:

Cheeks are next, no not those ones :p Use a really pinky color. I used my Smashbox O-Glow blush. Which comes out of the tube clear but when applied on skin turns pink. Apply it to the apple and your cheek bones. Blend really well so the color is not as strong. You want to have a pink glow, not a i-obviously-put-blush-on look.

For the lips, well Peach has really tiny lips. But I lined my lips with a pink color and put a peach lip gloss on. You can exaggerate her lips if you would like, it is really up to you :)
If you have brown hair like I do, get a blonde wig. I made a paper crown out of construction paper and glued little craft gems to it for just a simple Princess look. Her crown is really tiny so one piece of construction paper should be fine. And to secure the crown so it doesn't fall off your head you can use blonde bobby pins. :)
VIOLA! DONE! :D You have now been transformed into Princess Peach :) If you have any questions, comment, concerns, complaints ect. Email me! :)


