I am extremely proud of this look, and for the longest time I couldn't come up with "unique" Halloween tutorials, because basically any tutorial you want you can find online, so I tried to do ones that weren't already done, or done in a good fashion :p This is perfect for those Halloween parties you want to impress people or even trying to win a cash prize ;)

First you want to start off with a fresh clean face, moisturize and apply primer. Your foundation should be at least three shades lighter for this look, but really you can just use your regular foundation. I used Roy Lichtenstein's artwork as reference. The whole process will take you sometime so be patient.
Next sculpting the eyebrows, take a liquid eyeliner and fill them completely in. Make them dramatic, have the beginning of the eyebrows squared off and the ends come to a point. Really give them shape and definition.
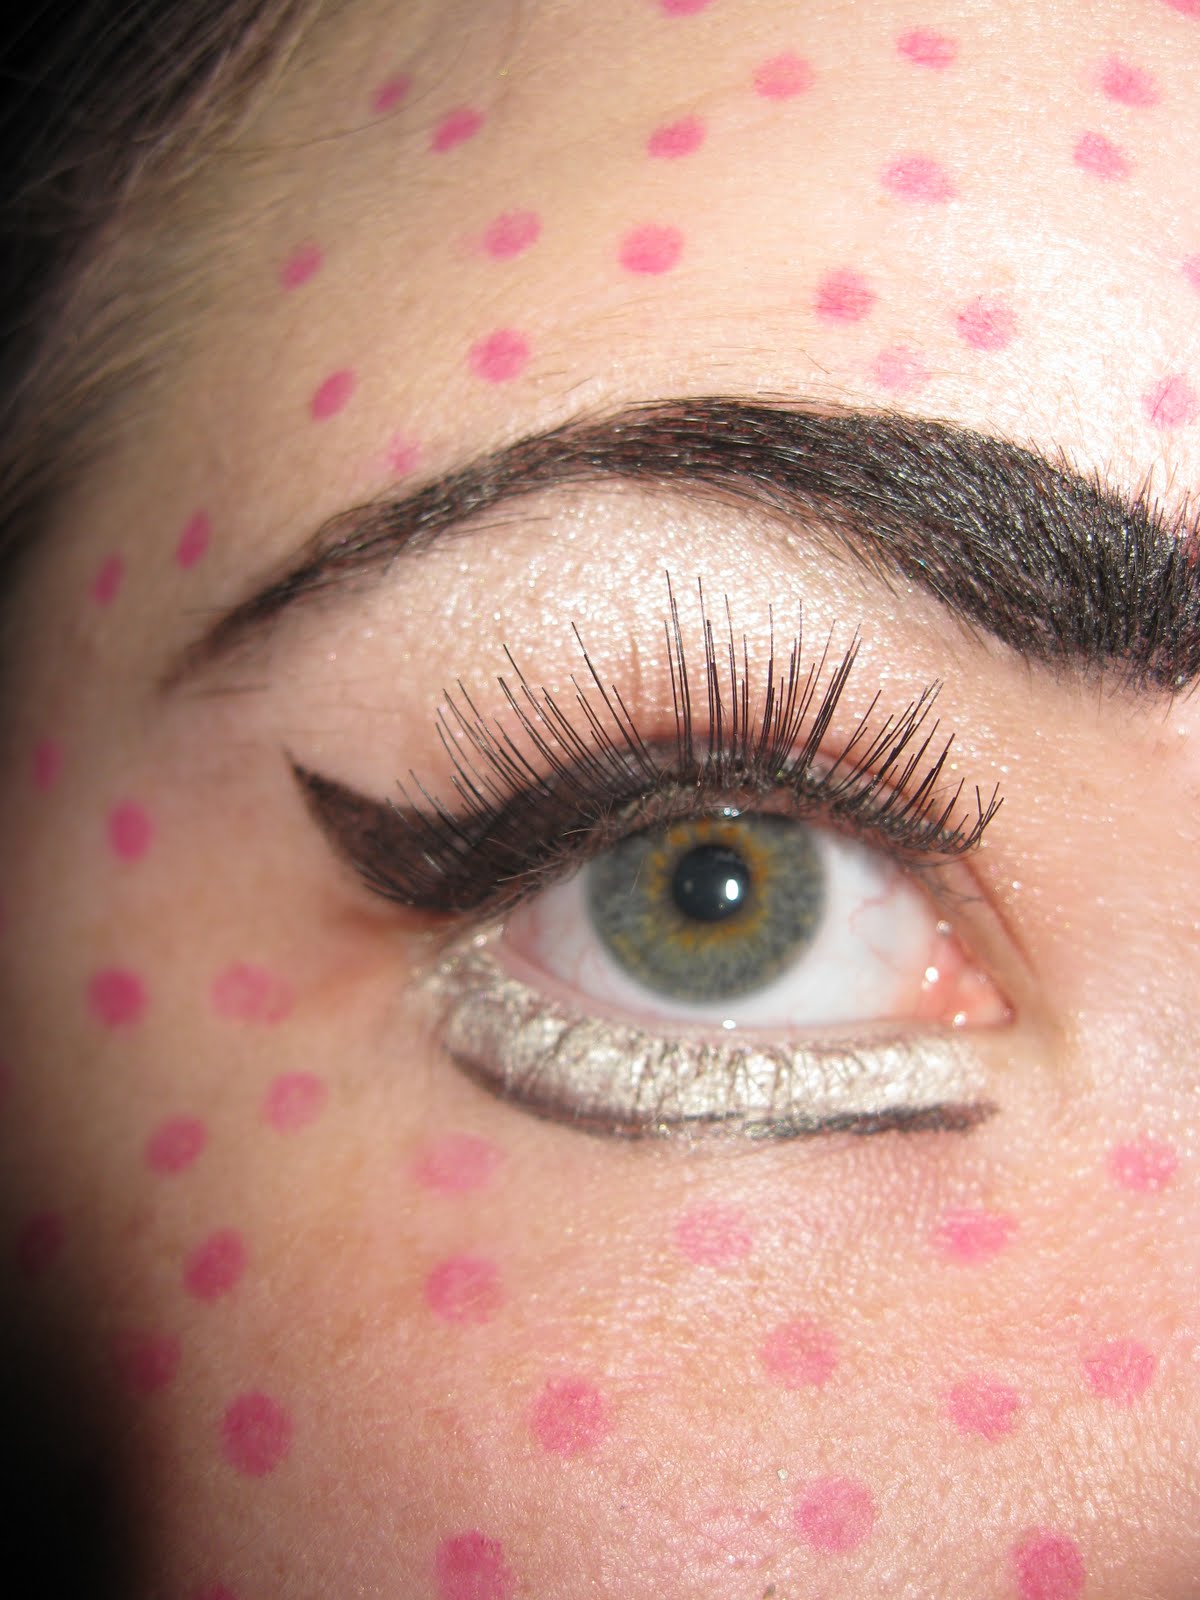
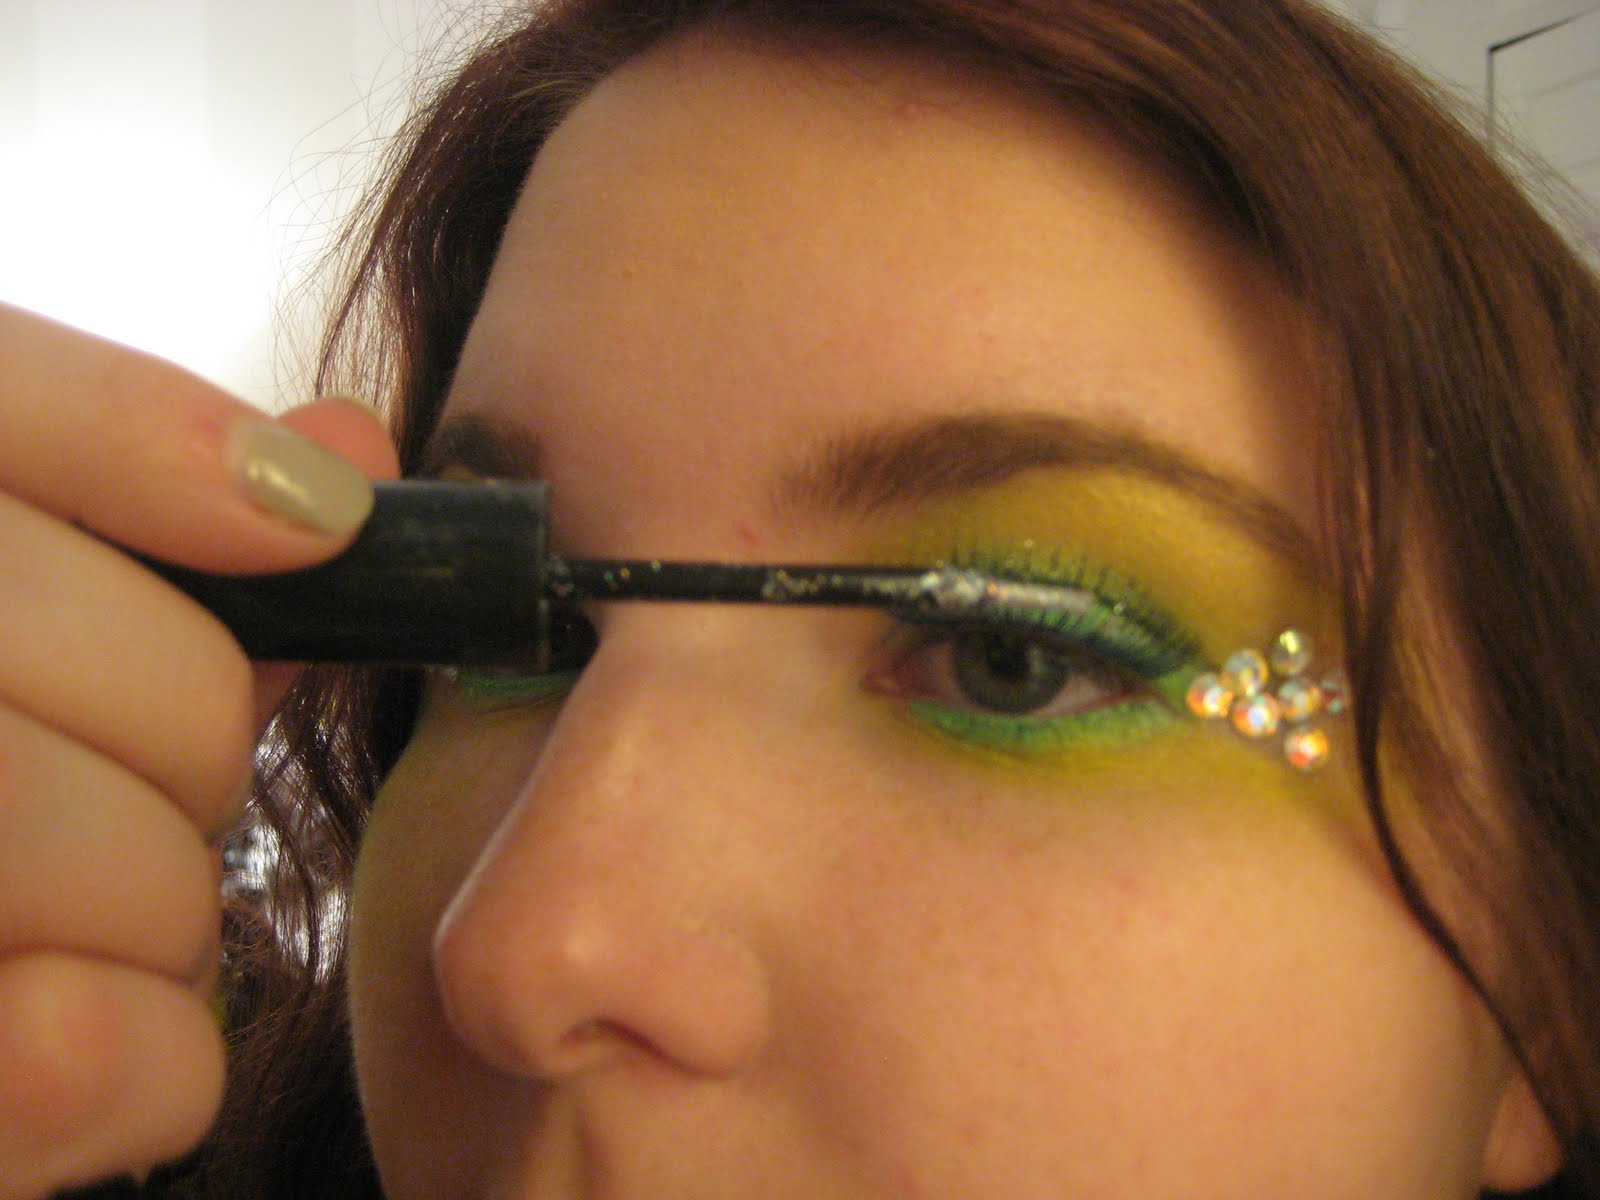
 Now for your eyes, it is really up to you how you want to make your eye look, I played with a couple different eyeliner looks and my favorite was the chunky wing. Take a liquid eyeliner I am using Telescopic liquid eyeliner by L'Oreal and play around with it, have makeup remover hand though ;) it really helps, trust me :p I also applied a little eyeshadow, just a light pink above the eyeliner (if you do this you will have to outline the black again) Take a shimmery white and apply it right under your brows. Take your liquid eyeliner and create a line an inch below your waterline, this makes your eyes appear doll-like and really makes them look larger. Apply false eyelashes, just get any big dramatic ones you'd like, any will do really. I am using Lash 4 by MAC. Take a white eyeliner and fill in the gap between your water line and the line you just created. Make sure you also fill in your water line as well. More is better in this case, this is creating that doll like eye. Making it appear larger and more open.
 Next outline your lips, mistakes are okay just try to keep your hand as straight as possible. After you have your lips outlined take a red lipstick, not stain, not lipgloss, actual lipstick, and apply all over your lips make sure you get the corners as well! After you filled in the lips then you can fix and mistakes, use makeup remover to erase and then redraw. It may take you a few times, it did me anyways.
 Last but not least is the red dots. Take a red lip liner and point on your face and twist it the tiniest bit to get the round shape. They should be in line with each other, which mine are not because I did this blind :p I don't know what happened to my contacts so I just did it blind :p but keep them in line if you can, and hey if they aren't who cares? Make sure you do your neck and right underneath your eyebrows. The best part about this look is that if you have pimples you can hide them with the lip liner!
Lastly is a wig a blonde wig is a better choice, you can also add lines for more definition like Lichtenstein does in his cartoons ;) Prepare to get complements! ;)
Hope you have enjoyed this tutorial I sure enjoyed making it for you guys :) If you have any questions, comments, advice, etc. Let me know! :D Email me!

Continue reading...

First you want to start off with a fresh clean face, moisturize and apply primer. Your foundation should be at least three shades lighter for this look, but really you can just use your regular foundation. I used Roy Lichtenstein's artwork as reference. The whole process will take you sometime so be patient.
Next sculpting the eyebrows, take a liquid eyeliner and fill them completely in. Make them dramatic, have the beginning of the eyebrows squared off and the ends come to a point. Really give them shape and definition.
 Now for your eyes, it is really up to you how you want to make your eye look, I played with a couple different eyeliner looks and my favorite was the chunky wing. Take a liquid eyeliner I am using Telescopic liquid eyeliner by L'Oreal and play around with it, have makeup remover hand though ;) it really helps, trust me :p I also applied a little eyeshadow, just a light pink above the eyeliner (if you do this you will have to outline the black again) Take a shimmery white and apply it right under your brows. Take your liquid eyeliner and create a line an inch below your waterline, this makes your eyes appear doll-like and really makes them look larger. Apply false eyelashes, just get any big dramatic ones you'd like, any will do really. I am using Lash 4 by MAC. Take a white eyeliner and fill in the gap between your water line and the line you just created. Make sure you also fill in your water line as well. More is better in this case, this is creating that doll like eye. Making it appear larger and more open.
 Next outline your lips, mistakes are okay just try to keep your hand as straight as possible. After you have your lips outlined take a red lipstick, not stain, not lipgloss, actual lipstick, and apply all over your lips make sure you get the corners as well! After you filled in the lips then you can fix and mistakes, use makeup remover to erase and then redraw. It may take you a few times, it did me anyways.
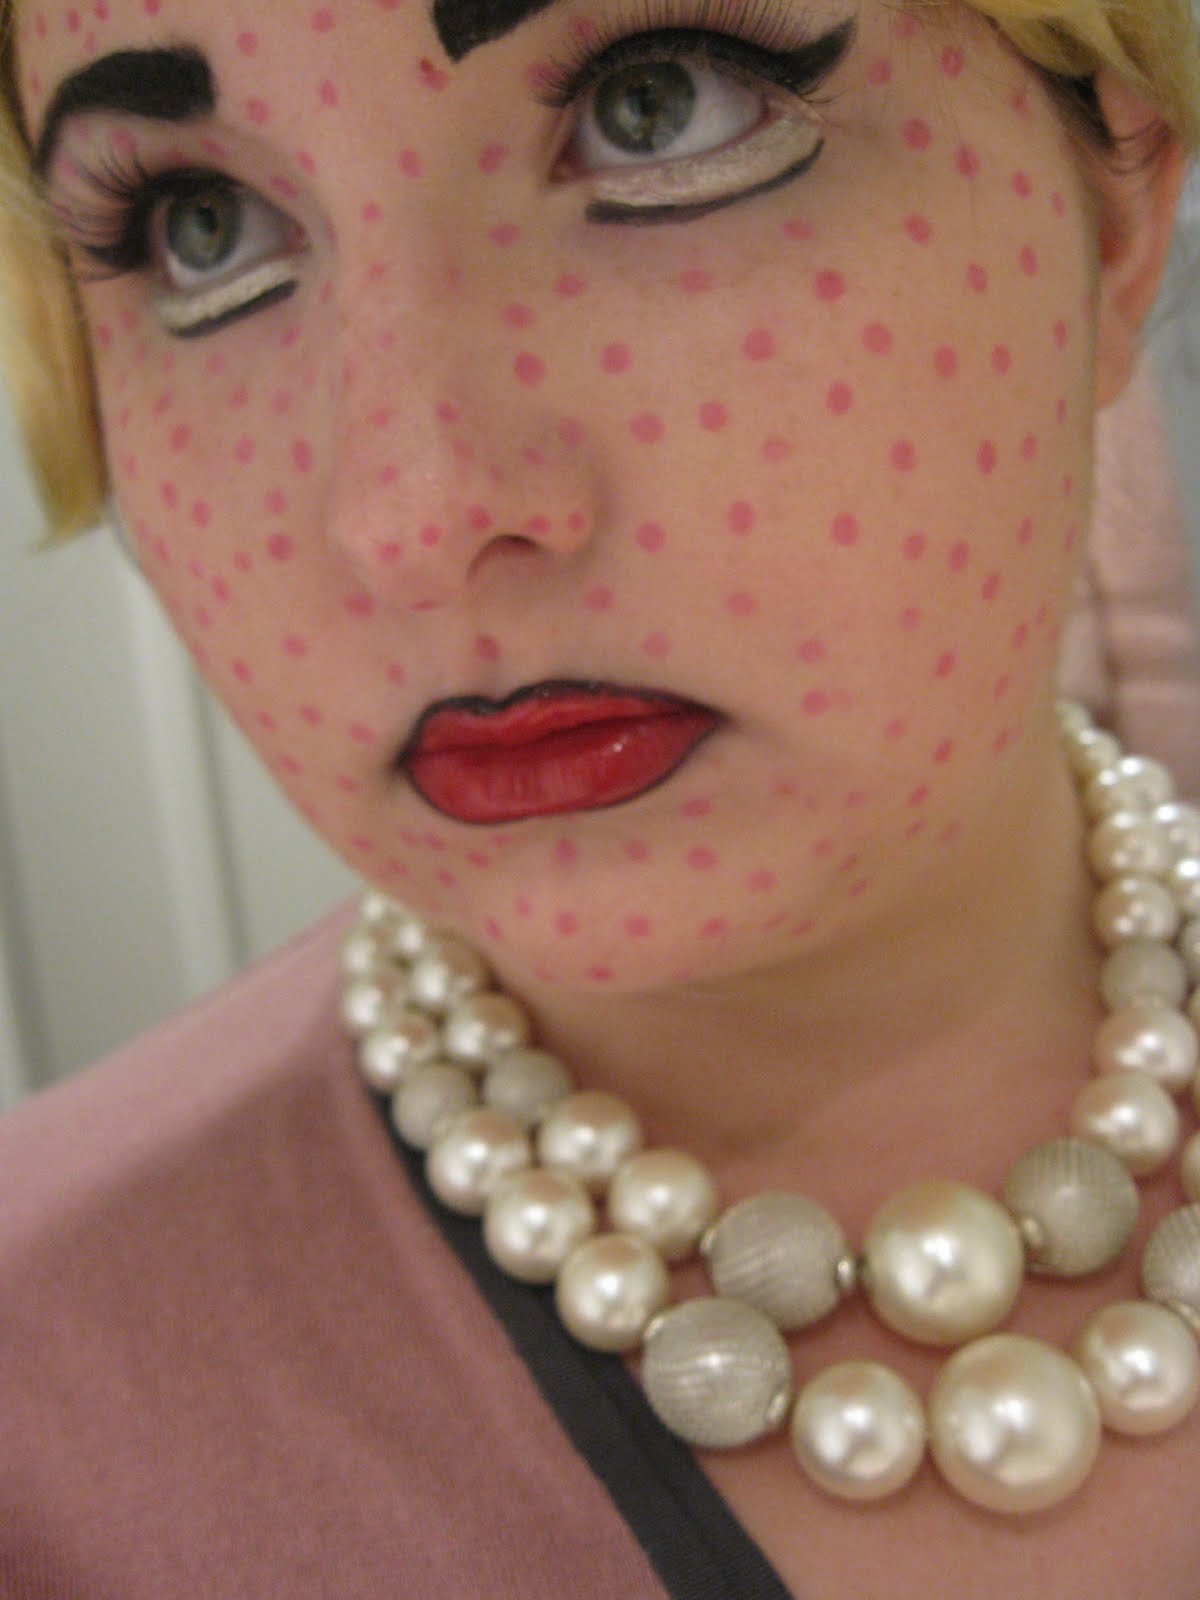 Last but not least is the red dots. Take a red lip liner and point on your face and twist it the tiniest bit to get the round shape. They should be in line with each other, which mine are not because I did this blind :p I don't know what happened to my contacts so I just did it blind :p but keep them in line if you can, and hey if they aren't who cares? Make sure you do your neck and right underneath your eyebrows. The best part about this look is that if you have pimples you can hide them with the lip liner!
Lastly is a wig a blonde wig is a better choice, you can also add lines for more definition like Lichtenstein does in his cartoons ;) Prepare to get complements! ;)
Hope you have enjoyed this tutorial I sure enjoyed making it for you guys :) If you have any questions, comments, advice, etc. Let me know! :D Email me!


